Together Wall Hanging
by Julie Creek
Creek Bank Creations, Inc.

The Large Expressions clear word titles are a great option for decorating.  The are totally clear so you can accent them any way you like.  They measure around 5"x15".

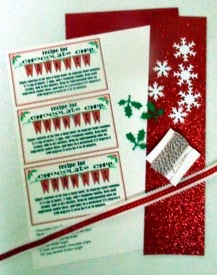
Supplies you need for this project:
Together Large Word Expression Clear
Your color choice of acrylic paint
Sponge or sponge brush for applying paint
Stazon Spiced Chai permanent ink
Stazon Ganache permanent ink
Stamp of your choice.  We used a swirl stamp.
Fiskars Stamp press
Creek Bank Creations Big Brother Sanding Stick
12x12 clear sheeting
Zip Dry Adhesive 
4 pieces 4"x6" heavyweight chipboard


Our product starts out totally clear. 

I altered and added some color, and hung it with some chipboard for a wall hanging.
Locate the word, your choice of acrylic paint and a sponge.  

Take the clear liner off the clear expression word.  It is located on both sides.  Turn the word over and apply a small amount of paint on the back with a sponge. Allow the paint to dry. 

Take the Creek Bank Creations Big Brother Sanding Stick and scratch the back of the piece, removing much of the paint.
Locate the Stazon Ganache ink and turn the ink pad upside down.  Rub the ink over the back of the word as shown.
Swipe if over the title several times.  Allow to dry.
 
Locate the Stazon Ink Spiced Chai ink and repeat. 
Cover the back with ink until you get the look you like. 
Turn the piece to the front.  Locate the stamp you want to accent the front with.  Adhere it to the Fiskars stamp press using the cling mount.  Turn the stamp press over and ink the stamp up with the Spiced Chai ink.   This photo shows the Fiskars stamp press.  I've had some questions about it so I will explain what it is!  The stamp press in the photo above is upside down.  The stamp press is great for stamping because you use the grid to place your stamp, then when you turn it over to stamp you can see exactly where you are stamping.  Love this tool, especially when stamping words or text to the inside of cards!  
Turn the stamp press over and stamp the word with the stamp.  Cover the front to your liking with the stamp and the ink.
 
Hang on the wall just this or accent it with chipboard!

To make the wall hanging locate a clear sheet (on our website listed above in the supply list)  and cut the piece into two pieces 4"wide by 12" long.  Adhere the chipboard, word and pieces onto the clear sheet with Zip Dry Adhesive. Type the phrase "wonderful place to be" on your computer and adhere it to the front.  Accent with flowers. 

Contact me with questions at creekbc@gmail.com
Free Freight on orders over $50.00
Julie Creek
Creek Bank Creations, Inc.
www.creekbankcreations.com
Class:  A Charming Surface!  Teacher Julie Creek
Saturday 10am   November 15th Cost $15.00
2 hour class
Appropriate for any skill leve
Sign Up for the class here!

This class is hosted by Creek Bank Creations at Scrap Camp in West Lebanon, Indiana.  This is a weekend event, but you can register for classes and just take classes. We will have several vendors on site and if you just want to shop and take classes you can.  If you want to take classes, and eat lunch with us on Saturday you can buy lunch on site for $7.00. If you choose this option you will not have a table to scrapbook at and there will be no lodging.  Email Julie at creekbc@gmail.com with questions. 

Join me as I teach you one of the most requested expansion surfaces I created. I'm teaching it again because you asked!  We will build a two page layout using a 12"x12" top loading format.  During class I will show you the other surfaces that I've developed and you will take home instructions so that you can make them all when you get home.  What are surfaces?  They are simply more places within a scrapbook page to place photos, journaling and embellishments! 
We will build this layout in class!  
Yep there it is the piece that slides out!

Oh yeh!  That entire page flips up!

I will share these layouts with you and give you full instructions for making them later!


This class is apart of our weekend event Scrap Camp.  Join us for the entire weekend or just sign up to take classses.
Learn more about Scrap Camp Here!
Sign up for this class here!
Hope to see you there!
Julie Creek
Creek Bank Creations, Inc.
www.creekbankcreations.com

Cookie In A Jar Kit

Mason Jars are so fun to work with because of all the creative options!  We've picked up a few mason jar items I think you will enjoy!


These wire items are heavy duty and offer many creative fun options for crafting!
I've put together a fun kit for Christmas Gift Giving that makes it so simple to give a cookie in a jar gift!

The kit contains the directions, the pre-printed cards, the ribbon and the punched pieces.  Just assemble and embellish!
Cut the recipe cards out and mat them on the red paper included. Slip into the wire holder. (wire holder not in the kit.  Find them on our website here.  

Turn the glitter paper over to the backside and trace the jar lid onto the paper.  Cut it out and adhere it to the lid.
Adhere the red ribbon to the jar ring using Beacon's three in 1 Adhesive. (Beacon's Adhesive not in the kit.  Find that on our website here)

Accent the punched holly leaves with green stickles glitter glue (Not in the kit, found on our website here) and accent the snowflakes with icicle stickles glitter glue (Not in the kit, but found on our website here )  Allow to dry.  Punch a hole in the pieces and thread them with bakers twine.  Tie them to the top.  Accent the neck jar with bakers twine. 

Add the Chalkboard label.  (Not in the kit.  Found on our website here

The wire items and the Chocolate Chip Cookie in A Jar Recipe Kit can be found on our website here!
Happy Creating!
Julie Creek
Creek Bank Creations, Inc.
www.creekbankcreations.com


Fun Flip Books

It starts out as a simple kraft book.  It's already put together.  You only have to add photos and paper!
Watch the video below to see how it works!


It makes the greatest, easiest flip book ever!

Here is what you need to know!  There is a clear tab on the right side of the back page of this book.  The books wants to get stuck on this tab.  To keep this from happening place a photo or cardstock completely over the tab.  This solves the problem!  

You can buy the flip book on our website here! 

Julie Creek
Creek Bank Creaitons, Inc.
www.creekbankcreations.com
creekbc@gmail.com
$100.00 crafting Weekends!
River Retreat House 


Fun Flip Books

by on 6:32 PM
Fun Flip Books It starts out as a simple kraft book.  It's already put together.  You only have to add photos and paper! Watch the ...
Baby Boy MDF Board

It started out as a raw mdf book.  Simple Enough.  This unit comes as two separate pieces.  I put paper on the back piece using Scotch Quick Dry Adhesive and paper from a paper pad.

I covered the front with the backside of this paper.
When adhering paper you want to use a thin line of glue, and run your hand over it and make sure you don't have any air bubbles.

Use Creek Bank Creations Sanding stick to sand the edges of the paper off the mdf product.  This gives you a clean edge.  

Accent the edges with a blue ink pad using the ink blending tool to apply ink.

Adhere the two pieces together using Scotch Quick Dry Adhesive.

Mark where you want your knobs to sit and drill a hole for them.  Place them on the board.

Accent with string or bakers twine.  Hang the photos and pieces of paper from the paper pad onto the string with safety pins.

Make your own clothes pin accents by adhering paper to the clothes pins with Scotch Quick Dry.  Sand the edges clean with the sanding stick.  Accent the piece adding the close pins as desired.  Adhere them in with Scotch Quick Dry Adhesive. 

This project can be adapted in so many wonderful ways.  
Thank you Debbie for the photos!

You can find all the products to make this project on our website here!

Julie Creek
Creek Bank Creations, inc.
www.creekbankcreations.com
creekbc@gmail.com
River Retreat House
$100.00 crafting retreat weekends! 
Family Wall Art

I recently ran across the folks from Clear Scraps and was amazed at the beautiful things that can be made with their products.  Today I will share with you the first of several projects that can be made with the clear products.
The product comes with a chipboard backing, and a clear front.  Simple Enough.  It only costs $12.99
I wanted to accent the piece with dictionary paper (cause I love it) and some wedding photos from my son and my daughter in love's wedding.

 I tore the pages out of the dictionary and tore them into random pieces.  I then accented the pieces of dictionary paper with Tim Holtz Distress ink Brushed Corduroy.  I adhere the paper to the chipboard piece using a small amount of Scotch Quick Dry Adhesive.  I then used Creek Bank Creation's Big Brother Sanding Stick to clear up the edges.


I then took the clear part of the product and used a dry erase marker to trace the letter shape onto each photo.  Wipe off the marker with a tissue when you are finished.  If you get any on the clear product wipe it off.  Cut the letters out.  I wanted to mat my letters so I used my Magic Matter to mat each letter.  

I then got out my Beacon's 3 in 1 adhesive and put a small amount on the back of the letter F.  I carefully placed it onto the chipboard using the top piece as a guide.  Because the adhesive does not dry fast I have a small window of time to move the letter around and put it where I want to place it.  Isn't that swell?    Place each letter on the board.
I accented the top with Prima Flowers and Want 2 Scrap Bling.  I placed more Beacon's adhesive behind the flowers and the bling to hold the entire piece together.  If you want it more secure you can add small brads placed through holes punched with the Crop A Dile Tool.

This is a great project that I think you will enjoy.  
What a lovely gift to your family!

You can find all the products to make this on our website here!
Orders over $50.00 ship FREE in the United States!
Happy Creating!
Julie Creek
Creek Bank Creations, inc.
www.creekbankcreations.com

River Retreat House
$100.00 crafting weekends! 


Family Wall Art

by on 7:45 PM
Family Wall Art I recently ran across the folks from Clear Scraps and was amazed at the beautiful things that can be made with their produ...
MDF Products
We are loving the MDF products around here!  They are so easy to accent and decorate with.  You can adhere paper using Scotch Quick Dry Adhesive for your own custom look.  When combined with paint this provides a stunning look!


This family board is awesome because it comes in two pieces.  Take them apart and paint them your desired color.  Then adhere paper to the background.  Glue the entire piece back together and accent as desired! 

I accented the family board with one sheet of chipboard, clothes pins and die cut flourish. Those products can be found here. 

All the mdf products can be found on our website here.  Orders over $50.00 ship free!
Don't forget the adhesive! 

Julie Creek
Creek Bank Creations, inc.
www.creekbankcreations.com
Scrap Camp

MDF Products

by on 3:24 PM
MDF Products We are loving the MDF products around here!  They are so easy to accent and decorate with.  You can adhere paper using Scotch ...