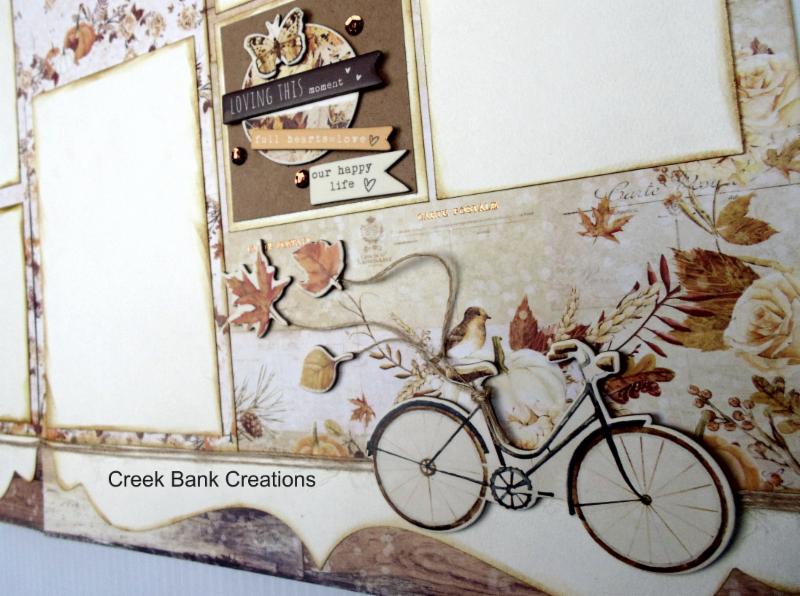
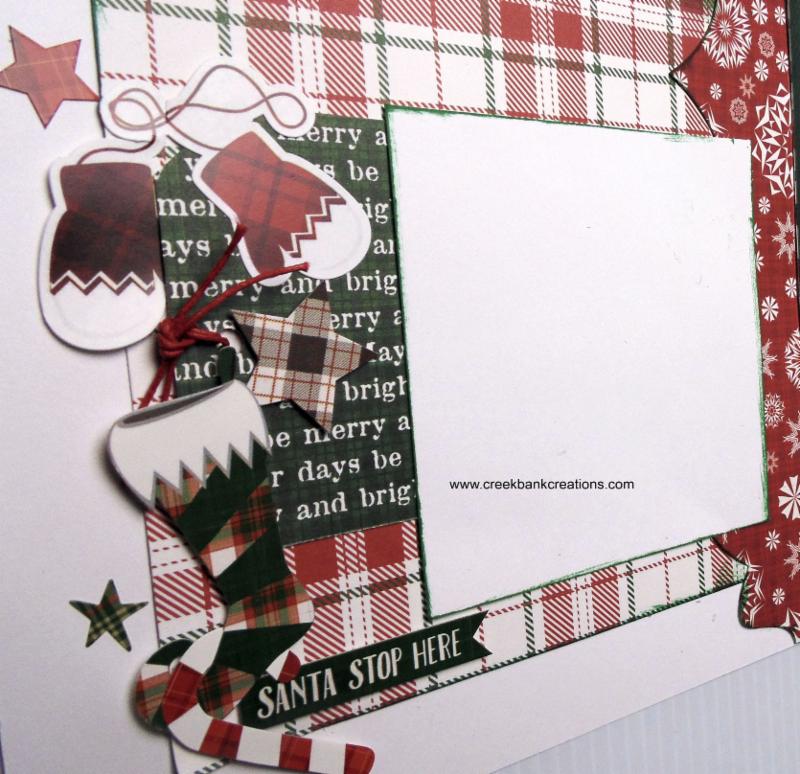
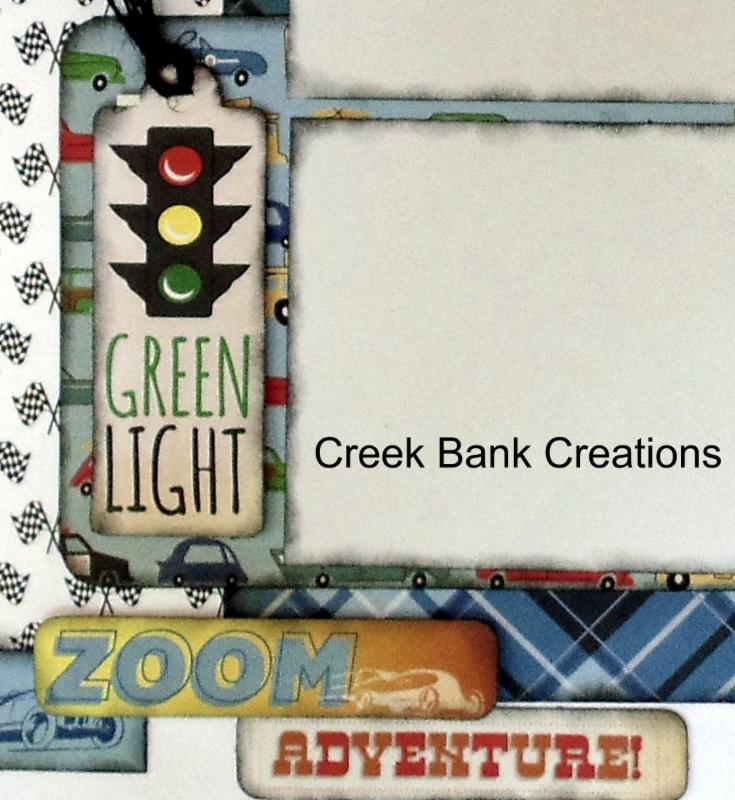
Creek Bank Creations Page Kit!
Family Vacation

 Family vacations always mean LOTS of photos!  I've designed this page to hold at least 6 photos, and a 6"x6" pull out for journaling or more photos!  Look closely at our layout below and you'll see the pull section on the layout!
I've used Creek Bank Creations slit die to die cut that slit into the lower right corner, and added a 6"x6" page protector! I've also added our tab die to make the pull out piece easier!  This kit contains all the papers you need, and a 12"x12" sticker from Echo Park.  I've included details and instructions in this page kit just for you!  


You need the following supplies to make this layout! Creek Bank Creations Slit die, Creek Bank Creations Tab Die, Creek Bank Creations Scallop top die (or use the pattern provided), 1-6”x6” page protector,  Tim Holtz chipped Sapphire distress ink, Creek Bank Creations Finger Dauber, pop dots, 3 chipboard strips 1/4” wide by 12” long, dull pencil or embossing stylist, corner rounder, small scissors or craft knife,   Liquid Adhesive (I like Tonic Craft Tacky glue), pencil, and paper cutter.  


Thanks and ENJOY!
Julie Creek
Creek Bank Creations, inc.
www.creekbankcreations.com
Perrysville, Indiana 


New Grateful Page Kit!


Creek Bank Creations Grateful Page kit.  This page kit is for a two page layout.  We start with a great background from Prima, followed by beautiful papers and a full sheet of 6"x12" self adhesive chipboard embellishments!  This layout will hold 7 photos!

We've included three years of burlap twine to accent your page!


You must provide Creek Bank Creations Scallop Top Die (or use the pattern and cut it by hand),
brown ink for edges of paper, finger dauber to apply ink, scissors, adhesive, 3 mini glue dots, and a paper cutter.

You can order on our website here!


3 days of scrapbooking in Indianapolis at the Indiana Paper Arts Gathering!

The Indiana Paper Arts Gathering is just a few days away and we still have room for YOU to join us!

We will NOT be hosting a camp in the Spring of 2018, so this will be your last time to craft with us until November of 2018!

We'll be gathering in the beatiful facility at The Hendricks County Fairgrounds just outside Indianapolis, Indiana Nov. 3-5, 2017. Should you decide to join us you'll find a full table to scrapbook at all weekend long, a gift for coming, your meals and chances to win door prizes! We have some great new things to give away! The weekend fee is $135.00. (lodging is not included) You can register here!
You'll find our booth and two other booths full of NEW and exciting scrapbooking and paper crafting goods! We have some beautiful new papers to share with you, and I'll be sharing Creek Bank Creations New Products!
You won't want to miss the fun!
Our theme this year is Crafter's Cruise! We'll be decorating our tables in a cruise theme and having a tacky tourist contest on Saturday Afternoon. Those wishing to participate in the Costume contest should have a short story (1-2 minutes) they will read or share with the crowd about the costume. The customers will vote on best table, and best costume.

All registrations must be taken through our website here. Registration closes this Sunday October 31, 2017!
Questions? Email Julie Creek at creekbc@gmail.com
www.creekbankcreations.com

Sliding Gift Card!

It's fun to make a gift that makes someone smile!  This sliding gift card I've designed certainly will do that!  You can watch my video and learn how to make the card!  The gift card is attached to the left, and a tab on the right.  The person pulls the tab to the right  and the gift card appears on the left!  
The gray card shown above is actually paper covered with duct tape!  Perfect for the guy on your list!
 I've used Creek Bank Creations Slit Die for that opening, and Creek Bank Creations Holly Oval Die.  The Holly oval die has been designed to fit perfectly on the front panel of the oval card! 


Products I've used!


All the products available on our website here

Tom and Julie Creek
Owners 
Creek Bank Creations, Inc.
www.creekbankcreations.com

Holly Jolly Page Kit! 


 This two page layout kit was designed by Julie Creek and uses Photo Play paper.  This two page layout will easily hole 5 photos, and the slide out segment holds another 4-6 photos.  We teach you how to build the slide out 6"x12" section when you watch our you tube video here.   
The video shows a pink layout, but the Christmas layout is the same design.

I have included full written instructions with the kit, nice color photos, patterns, all the pattern paper, cardstock, and a full sheet of12"x12" stickers.

You must provide Creek Bank Creations slit die, Creek Bank Creations Scallop Top Die, Creek Bank Creations Tab Die, Mememto Cottage Ivy Ink, 1-6"x12" page protectortonic craft tacky adhesive, (Optional Top for bottle here)  pop dots, scissors, standard hole punch, one mini glue dot, paper cutter and pencil. 
To construct this page kit you'll need to learn how to use our slit die!  I cover that in the video, along with some great other tips.  


We have several other kits on our website using the slit die on our website here! 


Sliding Snowman Card!  

New Slide Mechanism!


Perhaps you've seen our new slit die and our fun snowman card!  We're pretty excited about our new slide guide mechanism for slide cards!  Our new device is made from plastic, and is super easy to use!  The plastic slides along the paper slit and you don't have to worry about it tearing up!  Here's how you make a slide guide card!

 Start with your card design to decide where you want to put the slide hole. We have two dies that you can build slide cards with, so you'll want to decide which one you want to use!

 I often add some colored cardstock to the bottom of the card for snow, dirt or a road.  Choose your background paper as well.  Cut both those pieces to 5.25"x4".


Lay the white on top of the blue and cut through both layers at the same time.  This makes your snow hill the perfect match to the cardstock base!

Take your scissors and trim off the top part of the white to reveal a snow drift.  Adhere the snow bottom to the card.

Locate your slide guides.  You will notice if you look at the back that those pieces are different.  The female parts have little dots on the back of them.  The male part goes down first, and the female always goes on top.

You need mini glue dots and a 3/4" circle punch to complete your card!  Locate the male piece and adhere it to a 3/4" circle punched piece.  Punch the piece the same color as the background of your card to keep it from showing on the front.  The circle punch piece just helps hold the glide in place. 

Here's what the base will look like. 

 Locate your card.  Flip it over and ahdere chipboard shims to the back of the card.  You can find chipboard shims on our website here, or you can cut your own 1/4" strips.  We always use liquid adhesive on our cards so that we don't end up with sliding parts getting stuck in adhesive.  Find our liquid adhesive here. I use the no clog writing cap on my glue bottle and you can find that here.
 Turn the card over and place your slide guide that is adhered to the 3/4" circle in the slide slot.  If you have more than one slide on a card put them all in.  I used two slides on the snowman card.
Locate your accent piece that will be moving and adhere to female slide guide pieces to the accent piece.  Remember female pieces have little dots on the back.  
Turn the accent piece over and click the two slide guides together!

Use the liquid adhesive and run a glue line on the chipboard shims.  Turn it over and adhere the chipboard/card to the base card.  In this case our base card is white.  
This fun stamp from Penny Black worked out great for our slide card! You can find it on our website here.


The slide guides are super easy to use and offer many fun options!
Let us know what great projects you make with our slide guide!
Email photos to Julie at creekbc@gmail.com

Thanks for stopping by!


New Page Kit!  Counting Blessings!


Creek Bank Creations Count Your Blessings Page Kit.  This precious one page layout would be a wonderful gift!  Perfect for framing!  We started with basic pattern paper and then used gold foil paper.  This kit includes an entire package of ephemera and you will have many pieces left.  The pieces of ephemera in the kit include pieces that are gold foil.  They are beautiful!  I've added a twist with Nuvo drops you'll find in the instructions and I've included the twine for your embellishments! 
 You must provide 1” heart punch, standard hole punch,  1/16” hole punch, Nuvo drops bottle green, glue dots, adhesive, pop dots and paper cutter.

Check out our website to order!